
How to set up your E-conomic integration
Step 1: Confirm or create expense accounts in E-conomic
-
Sign in to your E-conomic profile
-
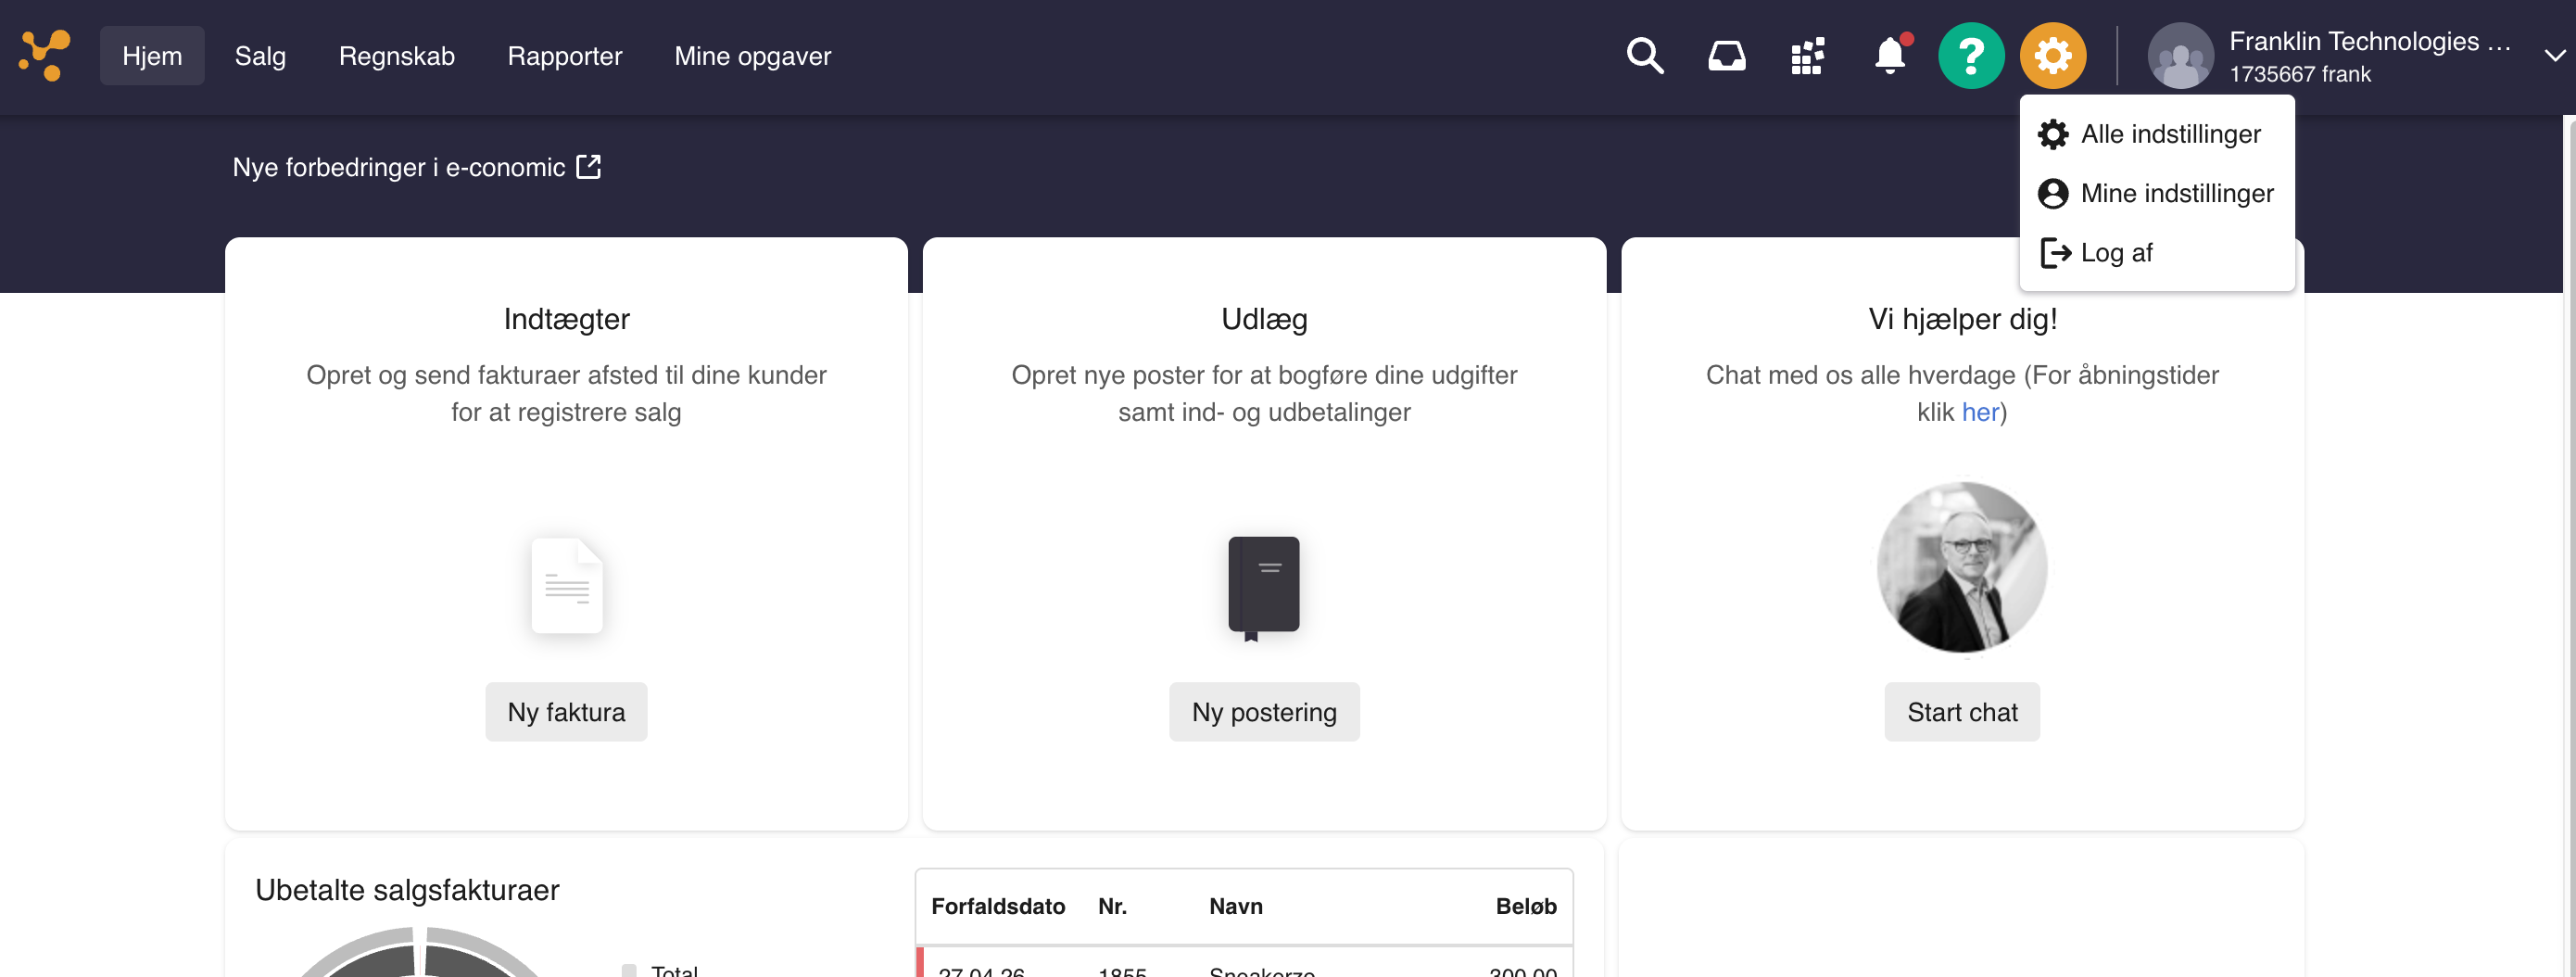
Go to "Alle indstillinger"
-
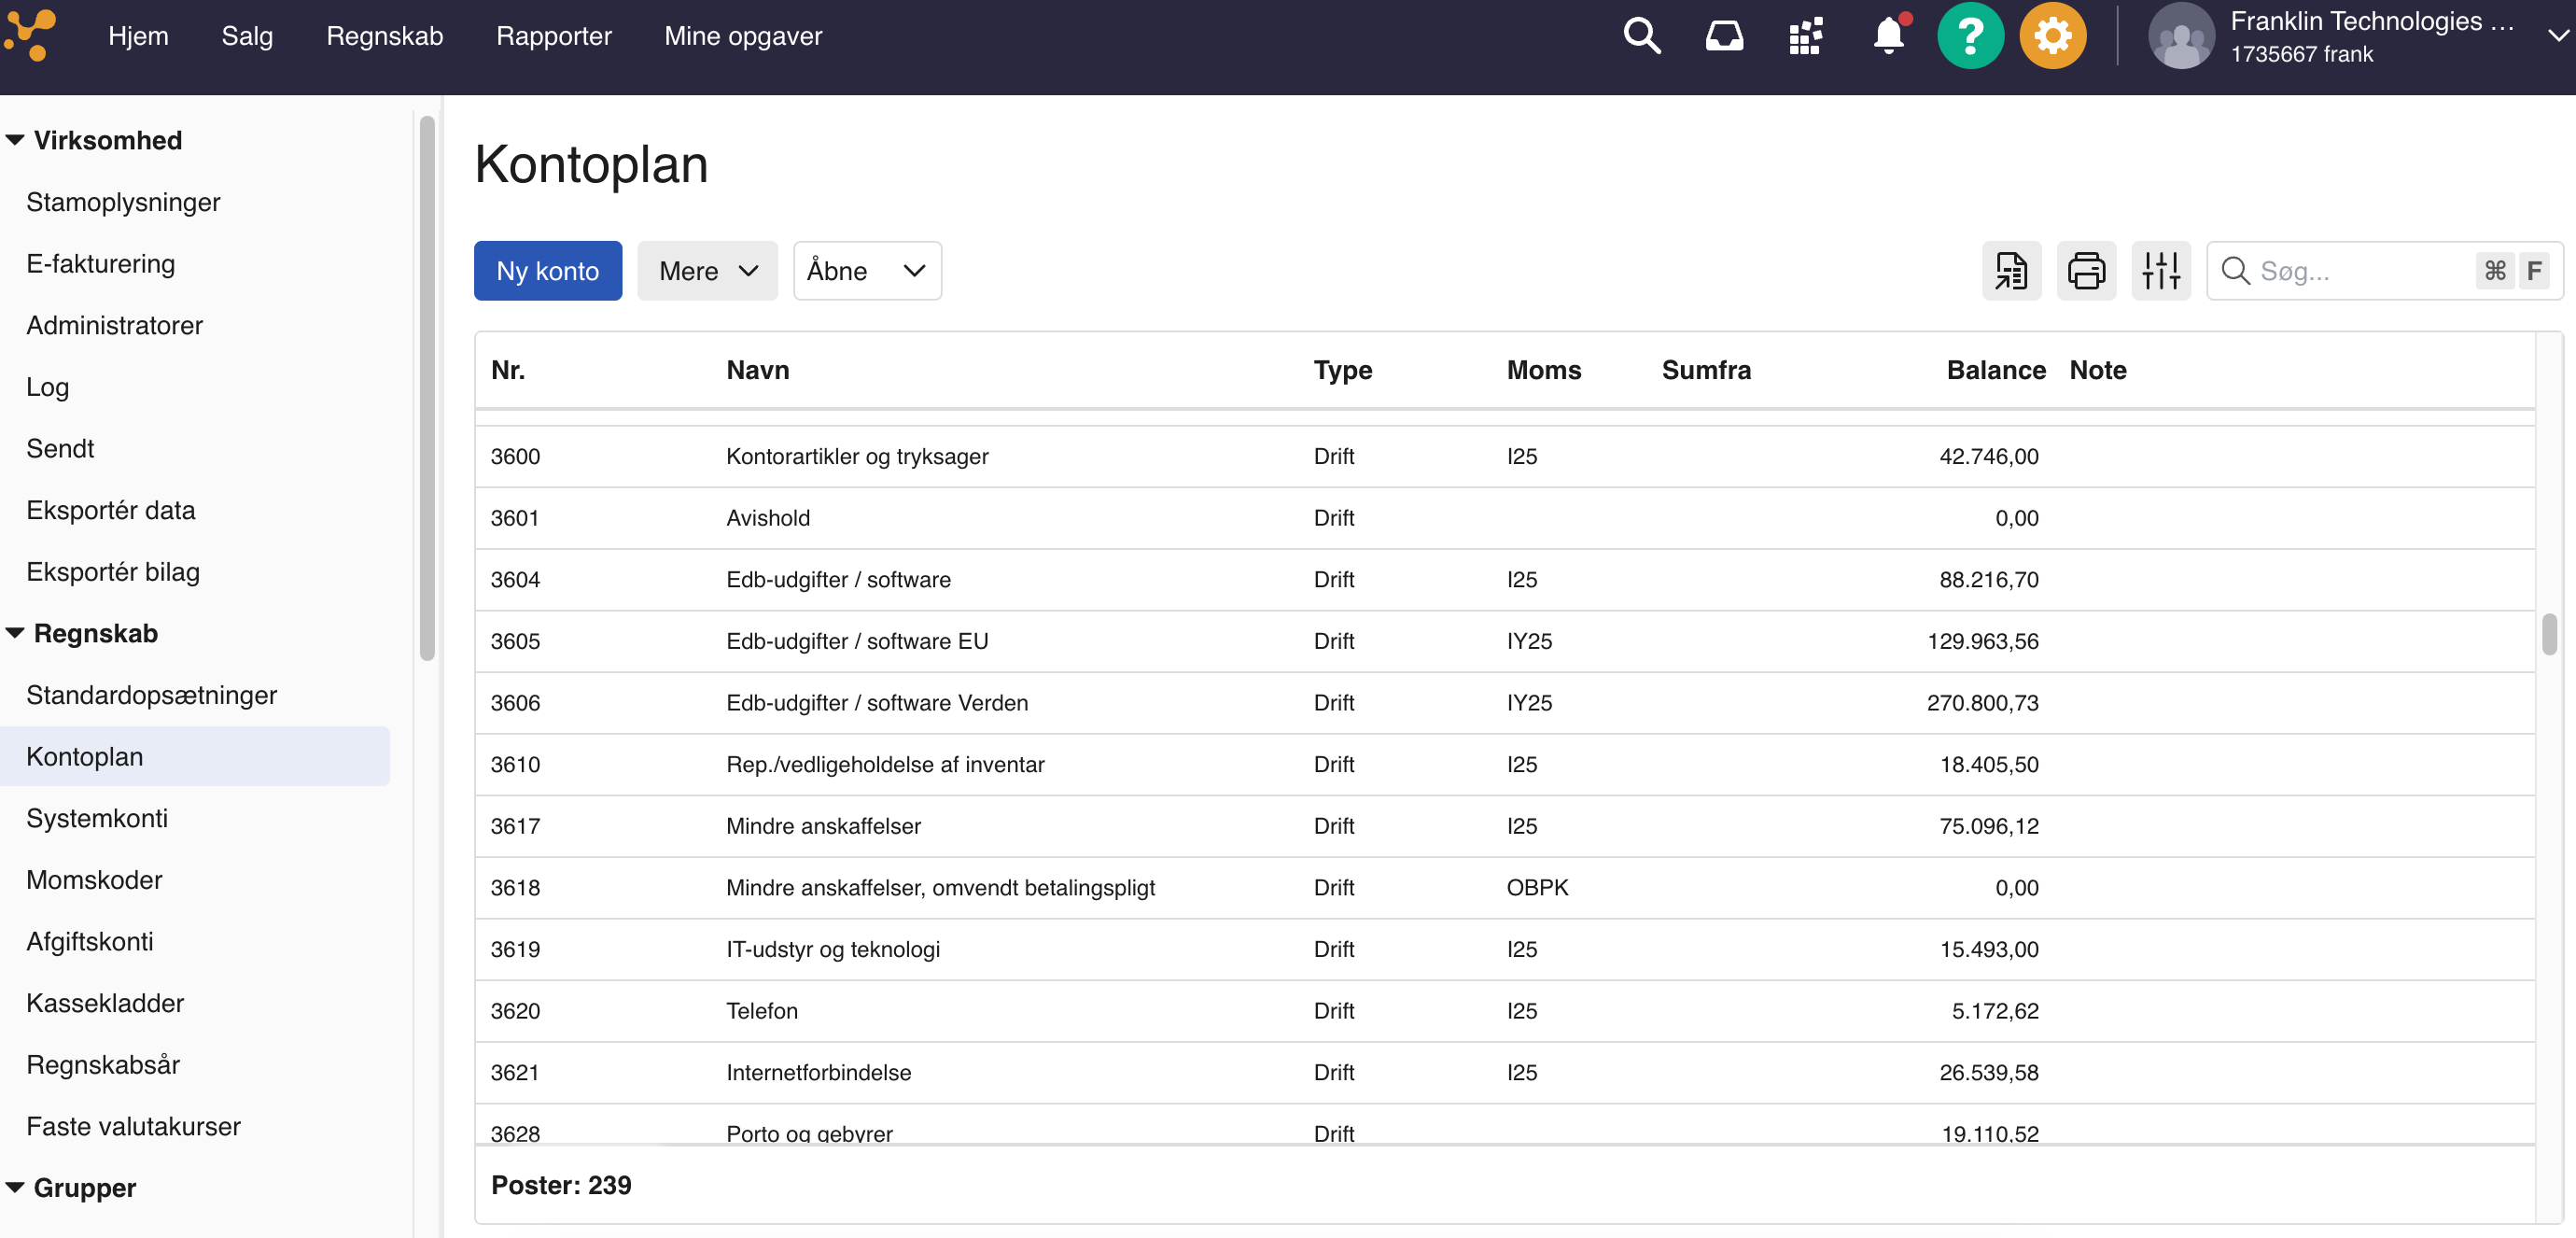
Go to “Regnskab” > “Kontoplan” and click “Ny konto”
-
If you don't already have the following accounts, make sure to create them now:
1. Annoncer & Reklame EU (Used for: Meta, Google Ads, YouTube, etc.) Must be within the 2800-2899 range. For VAT/Moms, select "IEUY - Ydelseskøb EU (rubrik A - ydelser)"
2. Annoncer & Reklame Verden (Used for: US Influencers, Reddit Ads, Pinterest, etc.) Must be within the 2800-2899 range. For VAT/Moms, select "IVY - Ydelseskøb fra verden"
3. Køb af software EU (Used for: Hubspot, Slack, Shopify, etc.) Must be within the 3600-3699 range. For VAT/Moms, select "IEUY - Ydelseskøb EU (rubrik A - ydelser)"
4. Køb af software Verden (Used for: OpenAI/ChatGPT, Adobe US, etc.) Must be within the 3600-3699 range. For VAT/Moms, select "IVY - Ydelseskøb fra verden"
💡 Want to split your expenses even further? (Optional pro-tip):
If you prefer to track your exact spending per platform directly in your financial statements (e.g., a separate account for "Meta Ads" and another for "Google Ads"), you can absolutely do that. Just make sure they are created within the correct range and use the correct VAT/Moms codes as shown above.
Step 2: Create Franklin-specific accounts in E-conomic
-
Sign in to your E-conomic profile
-
Go to "Alle indstillinger"
-
Go to “Regnskab” > “Kontoplan” and click “Ny konto”
-
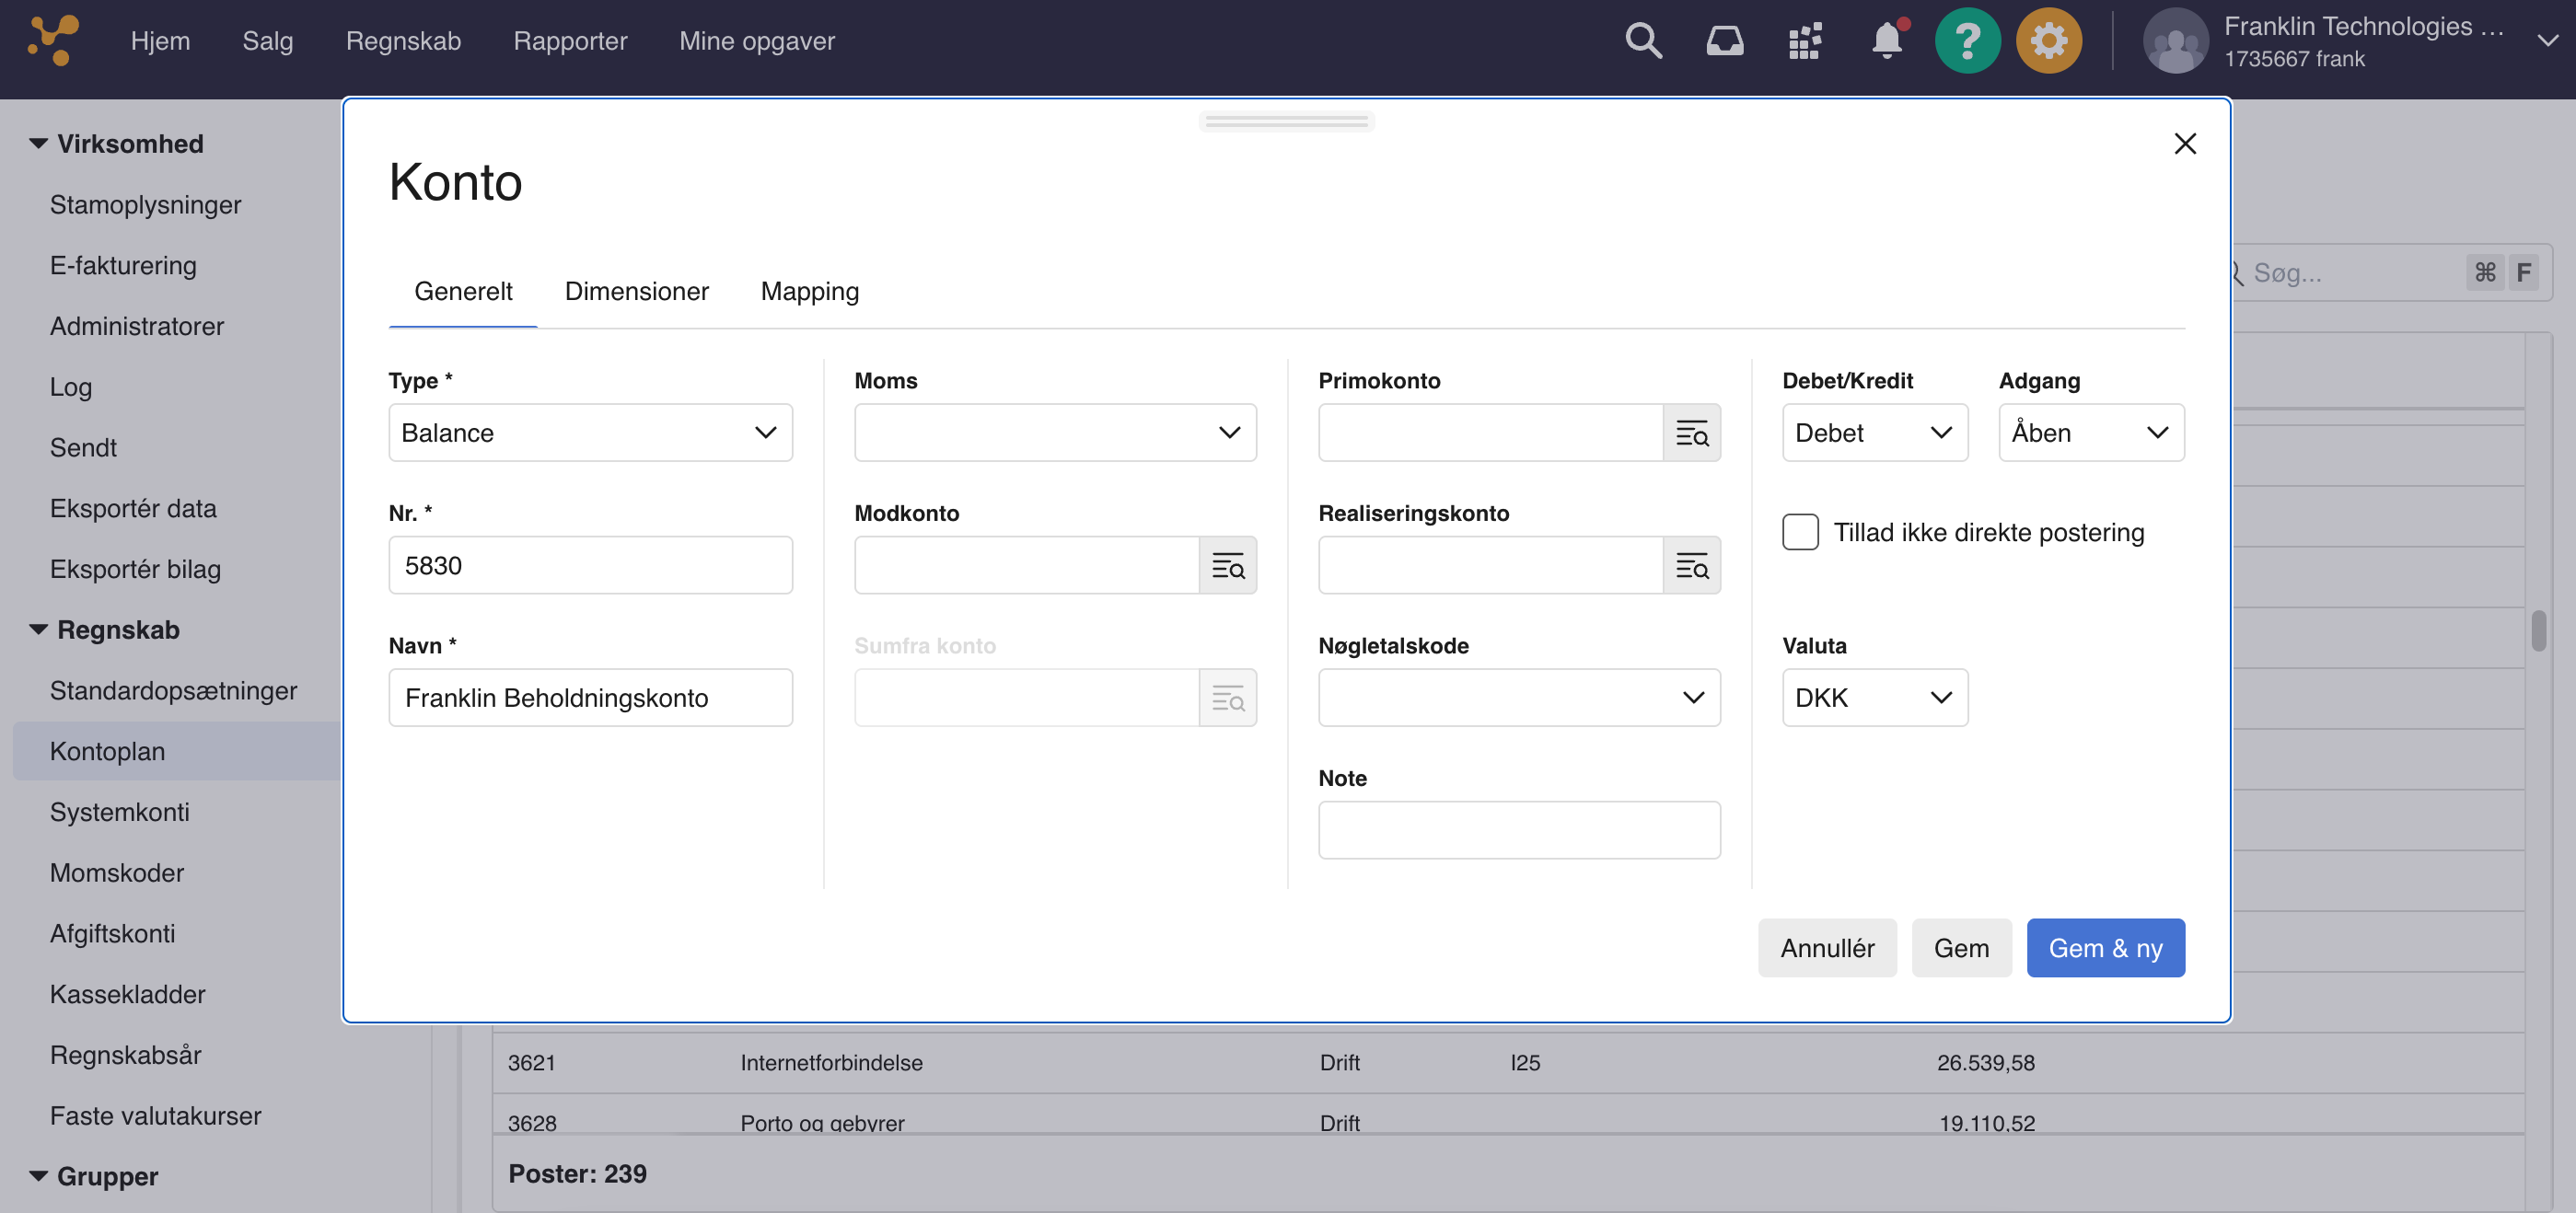
Create 'Franklin Beholdningskonto' (Your "bank account" with us)
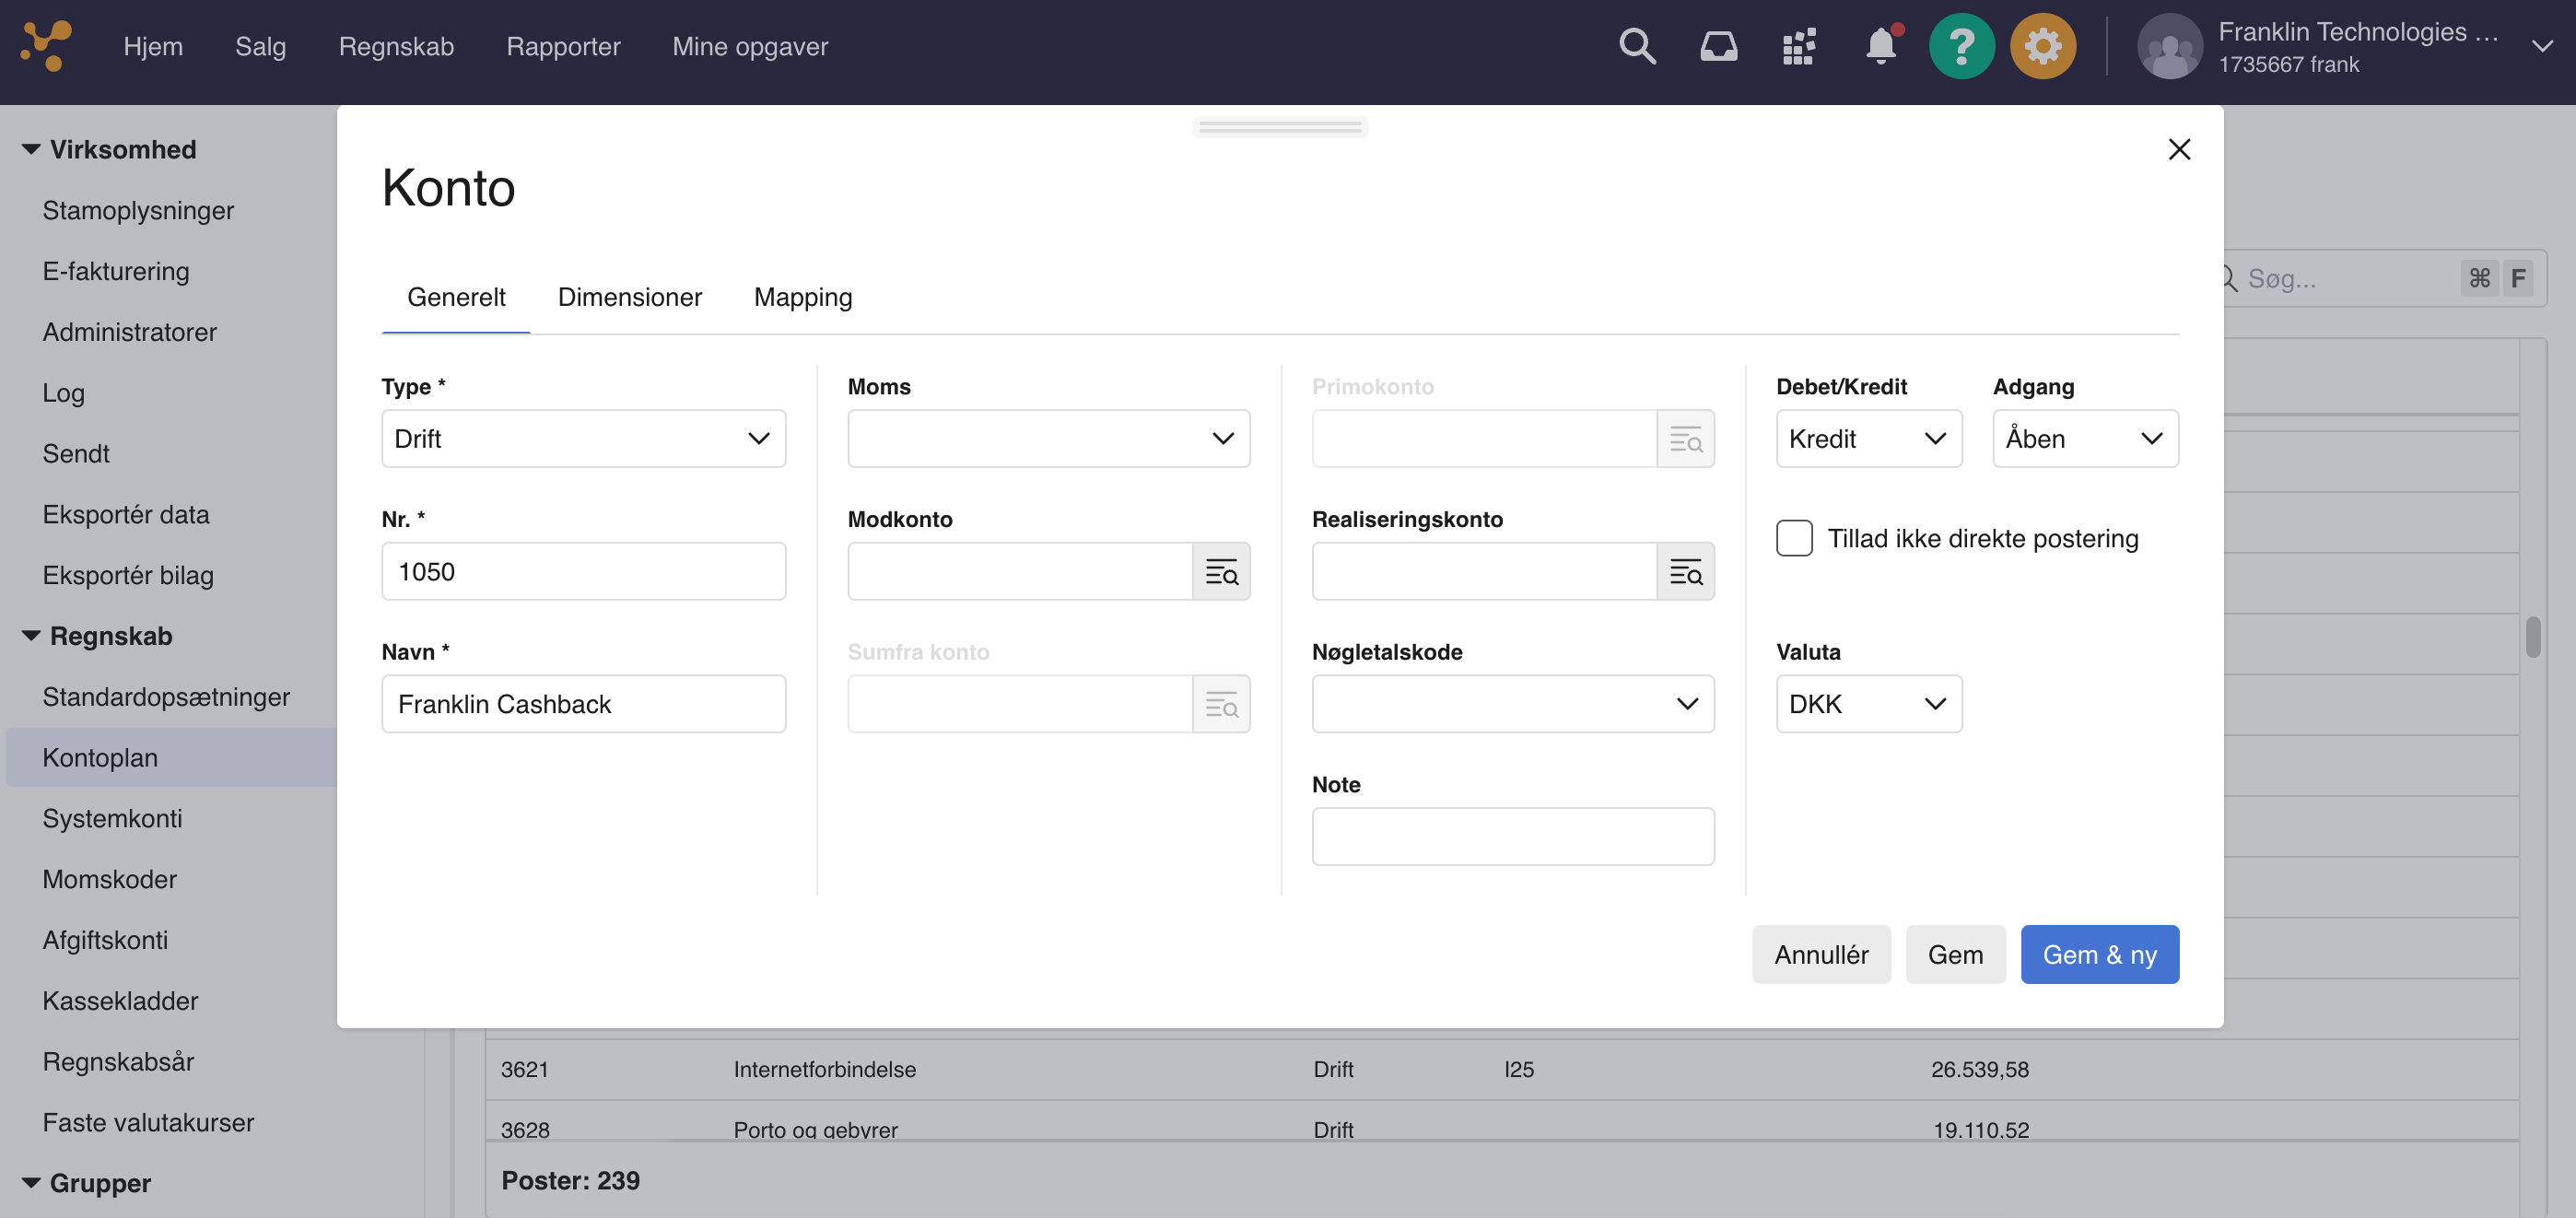
- Create 'Franklin Cashback' (Your earned bonus money)
Step 3: Set up the Economic-integration
-
Sign in to Franklin
-
Click “Integrations”
-
Choose your Accounting Software
-
Fill out your details*
